
Auto Send automatically sends bills to your accounting software when they match a rule and pass BillBjorn's checks. Bills that need attention stay in BillBjorn for you to review.
To enable Auto Send, go to Rules, create or edit a rule, and tick the Enable Auto Send checkbox. Set a maximum amount, confirm the warning and save.
Set up Auto Send
Create or open a rule. Go to Rules and create a rule for the supplier, or open an existing rule and click Edit. Upload a sample bill and set the keywords and coding (such as accounts, tax and line items).
Test the rule. Click Test Keywords to check that the rule matches the right supplier. Then click Test Rule to check the values it applies to the sample bill. Fix any incorrect matches or details before continuing.
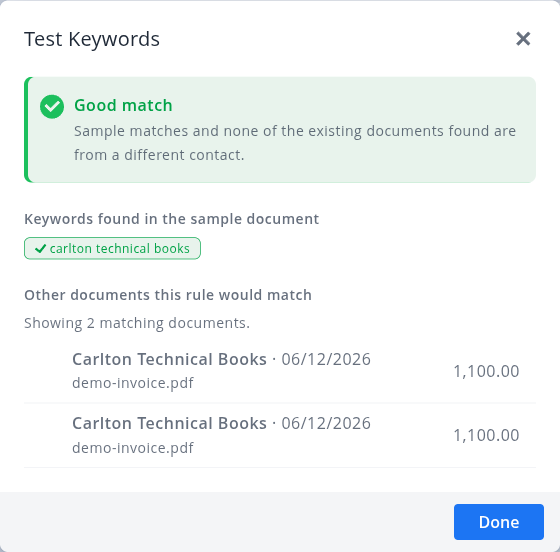
Test Keywords should show "Good match"
Tick Enable Auto Send. In the Auto Send Transactions section, tick Enable Auto Send.
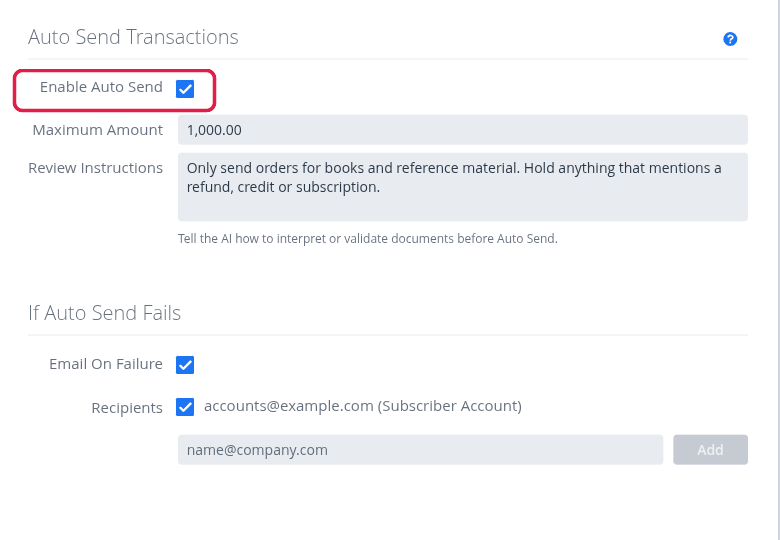
The Enable Auto Send checkbox
Read the confirmation message, tick the acknowledgement checkbox and click Enable Auto Send to confirm.
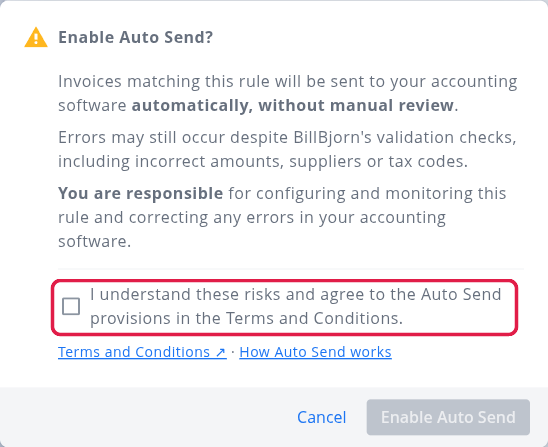
Tick the acknowledgement to continue
Set a Maximum Amount. This is the highest bill amount the rule can send automatically. Bills above this limit will be held for review. The maximum amount is required.
Click Save. Auto Send is now enabled for bills that match this rule.
Optional settings: Add Review Instructions to tell BillBjorn what to check for this supplier, and use Email On Failure to notify someone when a bill is held.
What happens after you turn it on?
When BillBjorn processes a bill that matches the rule, one of two things happens:
- Sent automatically: The bill passes all checks, is sent to your accounting software and appears in the Sent folder with an Auto Send tag.
- Held for review: A check fails, so the bill stays in your Inbox with an Auto Send blocked tag. It is not sent to your accounting software.
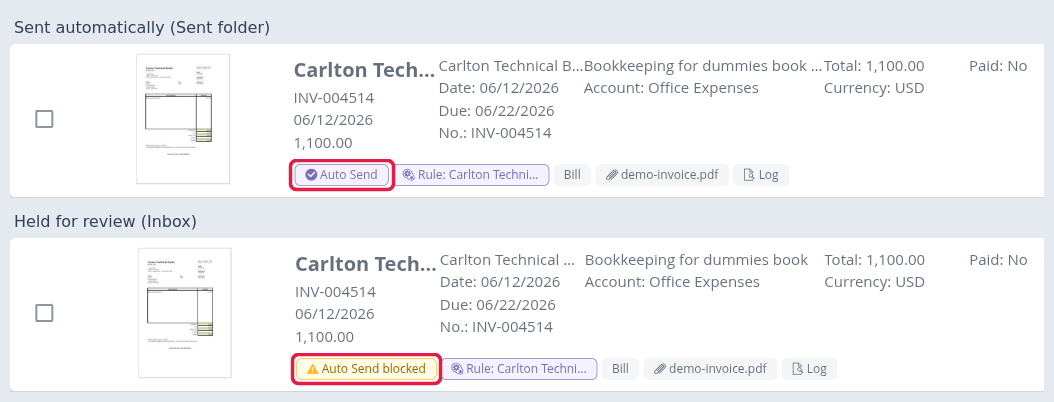
The Auto Send and Auto Send blocked tags
Click a tag to open Auto Send details and see what happened. For a held bill, look under Issues found for the reason. You can then review the bill, correct any problems and send it manually.
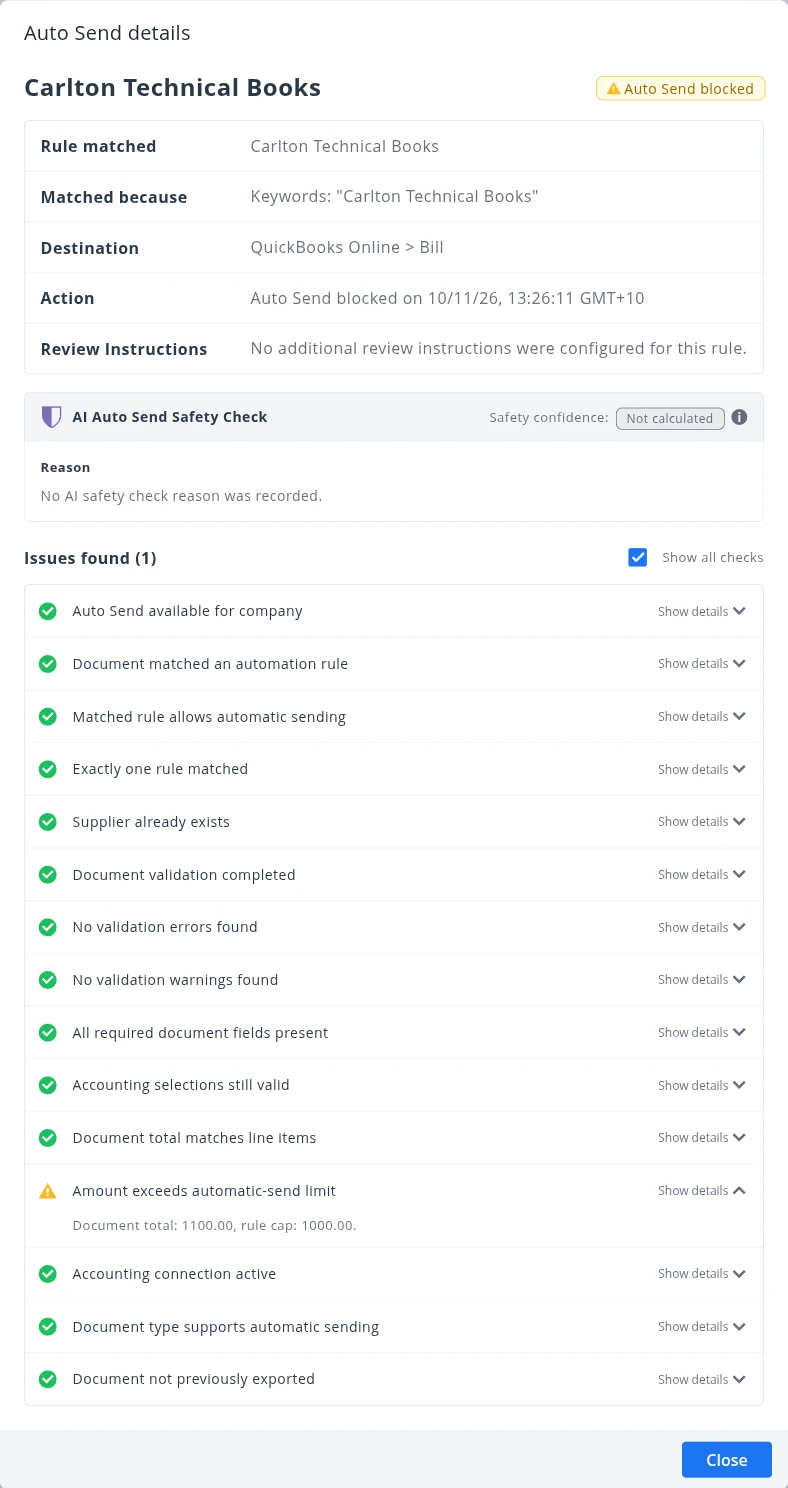
A bill held because its total is above the maximum amount
BillBjorn checks things such as the supplier, invoice data, duplicates, accounting codes, your maximum amount and the AI review result. A bill must pass every check to be sent automatically.
Who can use Auto Send?
- Auto Send is available on the Medium and Large plans.
- You need the Standard user role or higher to enable it.
- Your accounting software must be connected. Supported platforms are QuickBooks Online, Xero, Sage Accounting, MYOB Business and FreshBooks.
- The supplier must already exist in your accounting software, and the rule needs a sample document.
New suppliers will not be sent automatically. Bills that do not meet the requirements are held for review.
Tips for a safe start
We recommend testing a rule on several real bills before enabling Auto Send. Leave Auto Send unticked, use the normal review-and-send process for a few bills (ideally over two to four weeks), and check that the supplier, amounts, tax and accounts are correct.
Start with suppliers whose bills are consistent, such as rent or subscriptions. Set the maximum amount a little above the usual bill total, and check the first bills sent automatically.
Reviewing bills and managing Auto Send
- If a bill is held: Open it and click Auto Send blocked to see why. Common reasons include exceeding the maximum amount, a possible duplicate, an unknown supplier, or invalid accounting details.
- To monitor results: Go to Reports and open the Auto Send report. It shows bills sent, bills held and the reasons they were held. Review held bills regularly.
- To turn Auto Send off: Open the rule, click Edit, untick Enable Auto Send and click Save. Bills return to the normal review-and-send workflow.
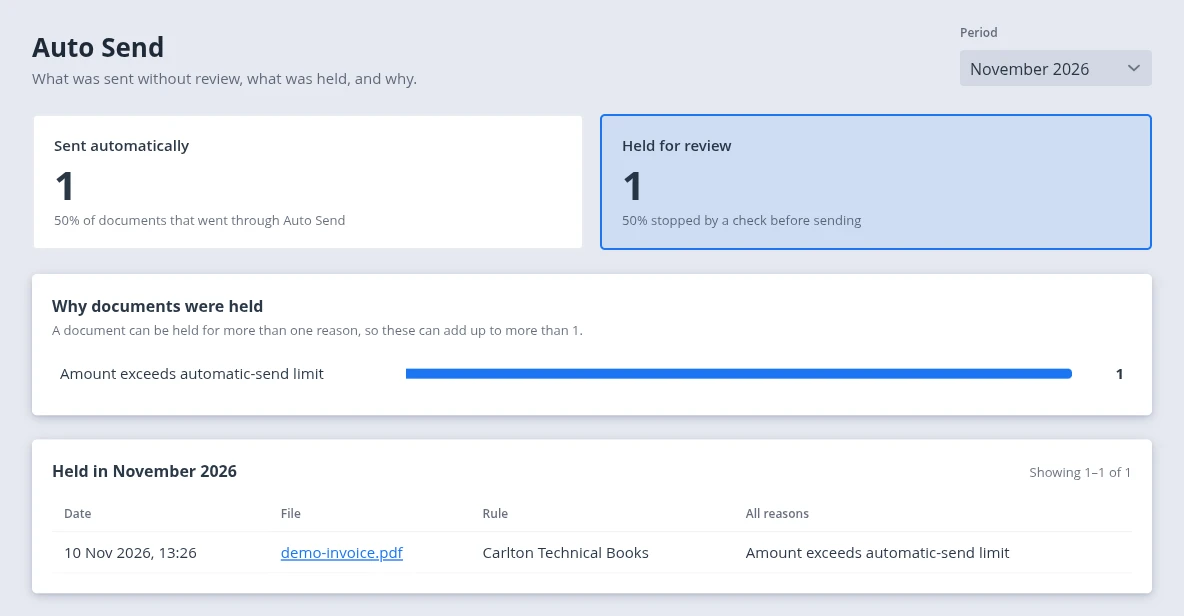
The Auto Send report
Frequently asked questions
Does Auto Send pay my bills?
No. It only records bills in your accounting software. It does not make payments.
Does it work with bills received by email or a watched folder?
Yes. Auto Send can work with bills forwarded to your BillBjorn email address or imported through a Scan2Invoice watched folder.
What if an incorrect bill is sent?
Correct the bill in your accounting software, then turn Auto Send off for that rule until you have fixed and retested it.